Geodirectory
Introduction
- WP Invoicing integrates with Geodirectory, for building fast, scalable directory websites with maps.
- To integrate WP Invoicing, both GeoDirectory and GeoDirectory’s Pricing Manager Addon, must be installed.
Setup
- Setup the GeoDirectory Pricing Manager Addon and create a pricing package that is not free.
- Configure WP Invoicing with settings and gateways to help your customers finish checkout.
Resources
How can I offer a trial period for a Geodirectory listing subscription using a discount code?
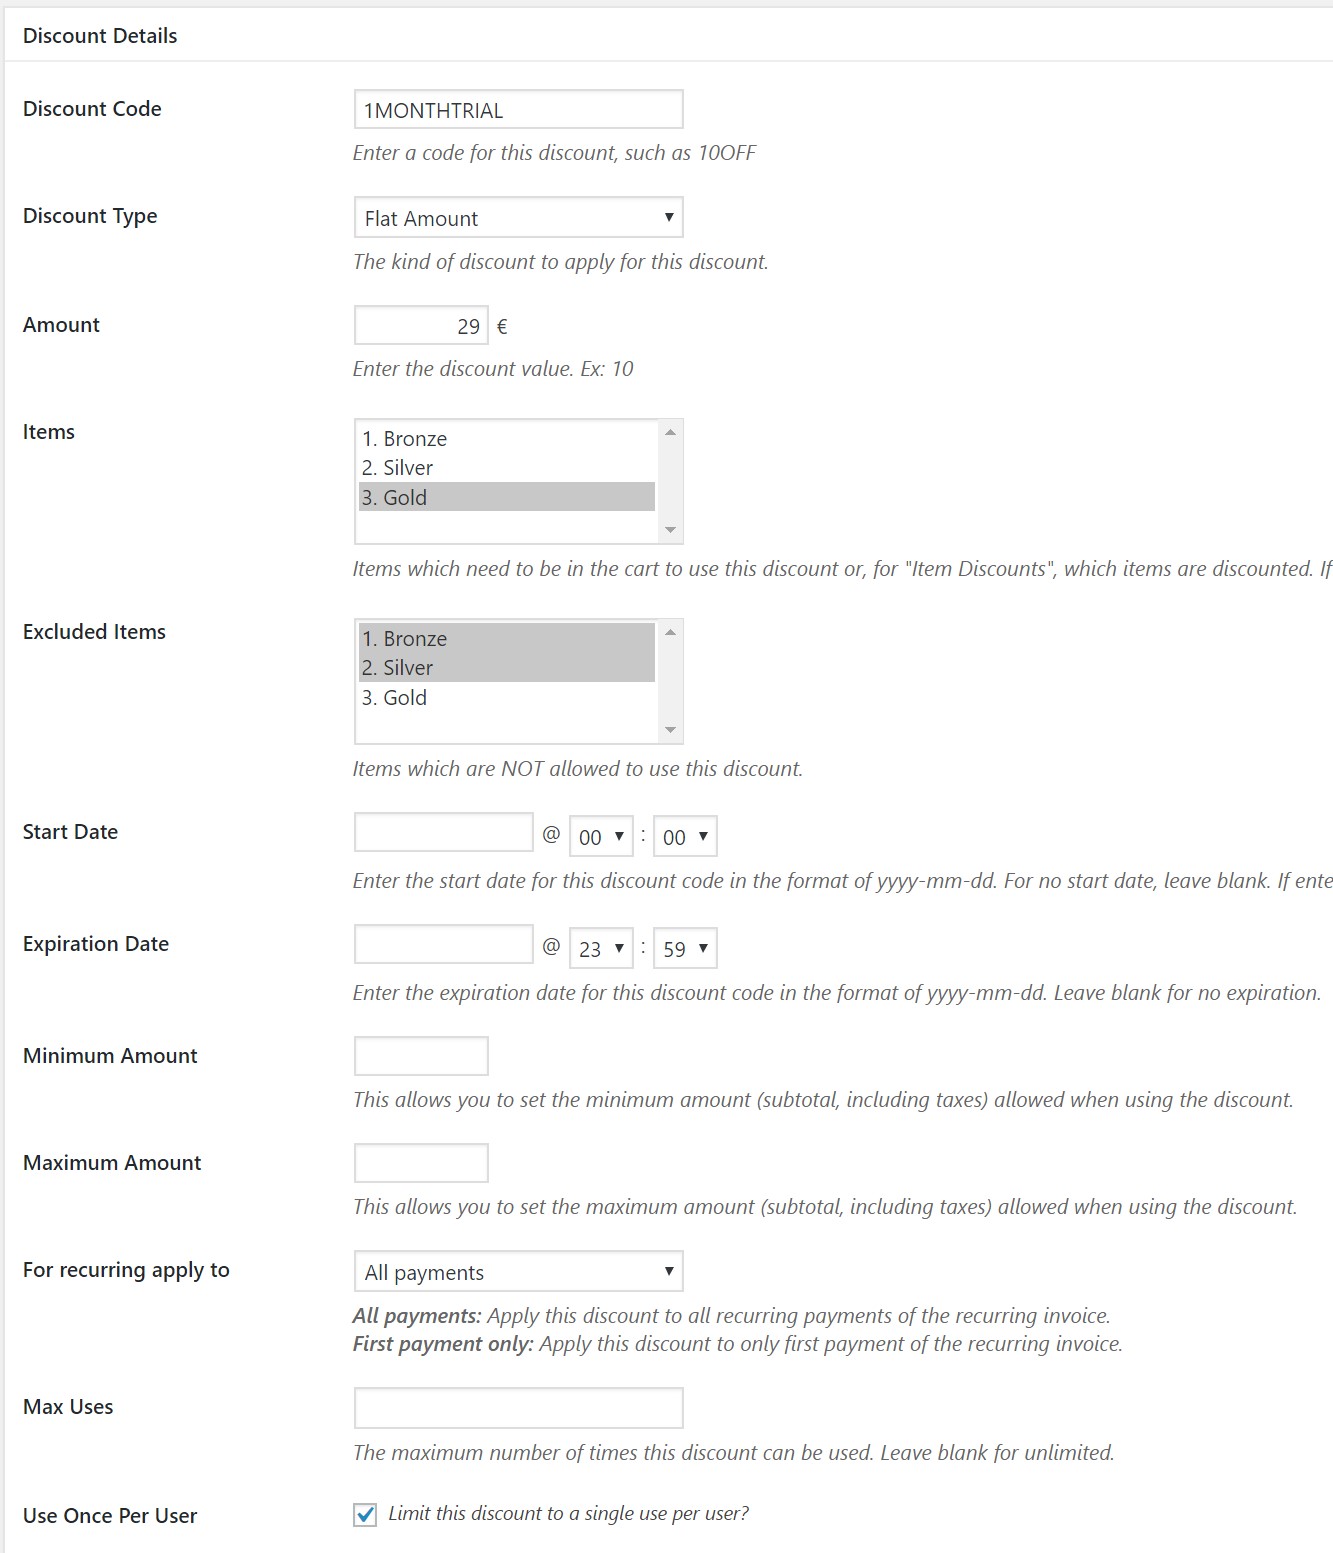
It is possible to use WP Discounts with Geodirectory listing Price packages. Each package is listed in the discount settings, so that specific discounts can be set up for one or more price packages.
In this case, the following settings could be used to offer a “Trial Period” that gives a €29 discount on a €30 per month listing price package named called “Gold”.
- Unique Title
- Discount code – 1MONTHTRIAL
- Discount Type – Flat
- Amount – 29
- Items – 3. Gold
- Excluded Items – 1. Bronze 2. Silver
- Recurring – apply to first payment only
- Use Once Per User – Check
- Save
To create the discount:
- Check target price package and confirm settings in Geodirectory -Prices and Payments – Price Package – “Disable Coupon Use?” – No
- Create new discount at Invoicing – Discounts – New
- Check discount details to make sure target price package is selected in “Items”
When a site visitor registers and claims or adds a listing, if they choose a price package that is not free they will proceed to checkout. After confirming their billing details and payment method, an invoice will be created. The invoice will include the title of the listing like this:

Invoicing allows you to create additional items for sale on your site. Your site visitors can click a buy button and pay for the item. You receive a notification email. One example might be setting a listing to “Featured” for the remainder of the listing period. Here are the steps you could take to list this “Featured Listing Service”. You will need to create a shortcode: https://wpinvoicing.com/docs/core-shortcodes/
- Add a WP Page where you will describe the “Featured Listing Service”. Write some text about the service and how valuable it is. Save the page and keep it open, we will come back to it in a moment.
- Open the menu for WordPress- Invoicing – Items
- Add a new item called “Featured Listing Service” and set the price
- After saving, click the menu for “Items” again and see what the ID is for the new Item. Let’s say the id is “8”.
- Create a shortcode Buy button:
[wpinv_buy items=8 label="Buy Featured Listing Service"] - Paste the shortcode on your WP Page where you described the service.
- Test the purchase of the service with the test gateway, and then with the sandbox for your favored gateway.
- When someone buys the service, then upgrade their listing manually to “Featured”.