
a few months ago, we started working on the re-branding of our Invoicing plugin.
Because of all the new features, the name “Invoicing plugin” was starting to sound reductive.
Today, after a soft launch that went on for the past few weeks, we are officially re-launching it with a new name:
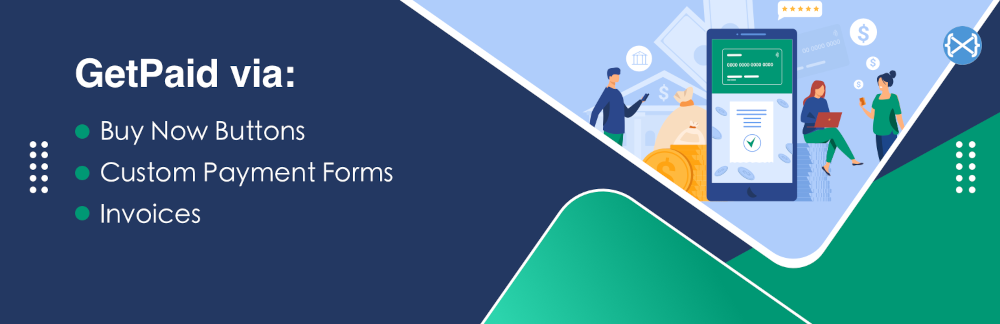
GetPaid
The easiest and fastest way to start selling online with WordPress
We built the invoicing plugin a few years ago to serve as the payments plugin for our flagship product, the GeoDirectory plugin.
Back then, we decided also to make it work as a standalone plugin to allow users to send quotes & invoices and receive payments for their freelance work.
Today, you can still use the GetPaid plugin as a Payment System for other plugins.
Users can still send Quotes & invoices and receive payments.
However, we also extended it with quite a few new exciting features that allow anyone to start selling online with WordPress within minutes.
You can also sell services and digital or physical products.
GetPaid is ideal for anyone who, for any reason, thinks that setting up an entire WooCommerce store for what they need is overkill.
You can also use our payments plugin to accept donations and as a crowdfunding solution.
In this blog post, I will recap and showcase every payment solution the GetPaid plugin offers you.
- Payment System for 3rd Party Plugins.
- Invoicing System For Professionals.
- Buy Now Buttons.
- Optimized Check-out Forms.
GetPaid is the most feature-rich FREE WordPress payments plugin to start receiving payments online quickly.
Let me show you why:
Payment System for 3rd Party Plugins
This is what this plugin is originally for, accepting payments for every listing sold through a GeoDirectory-powered website.
With just a few lines of code, any plugin can create a new GetPaid Item and send users to a GetPaid check-out form to complete a sale.
The GetPaid plugin will also create an invoice for each transaction.
WordPress developers will save countless development hours using GetPaid as the payment system for their plugins.
They will be able to offer several Payment Gateways to their users without forcing them to install a heavyweight plugin like WooCommerce.
In a future blog post, we will provide a complete tutorial with a real-world example of accepting payments for a 3rd party plugin with GetPaid.
Invoicing System For Professionals
We didn’t change anything about these features.
Freelance professionals can still send Quotes & Invoices, accept payments through a vast array of Payment Gateways and even manage subscriptions.
Let me show you how quickly the above can be done.
Create an Invoice with GetPaid
after installing and activating GetPaid. A new menu will appear on your WP dashboard.

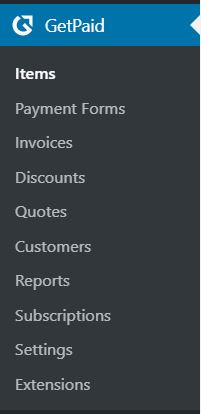
Click the Invoices link next to the Add New button.
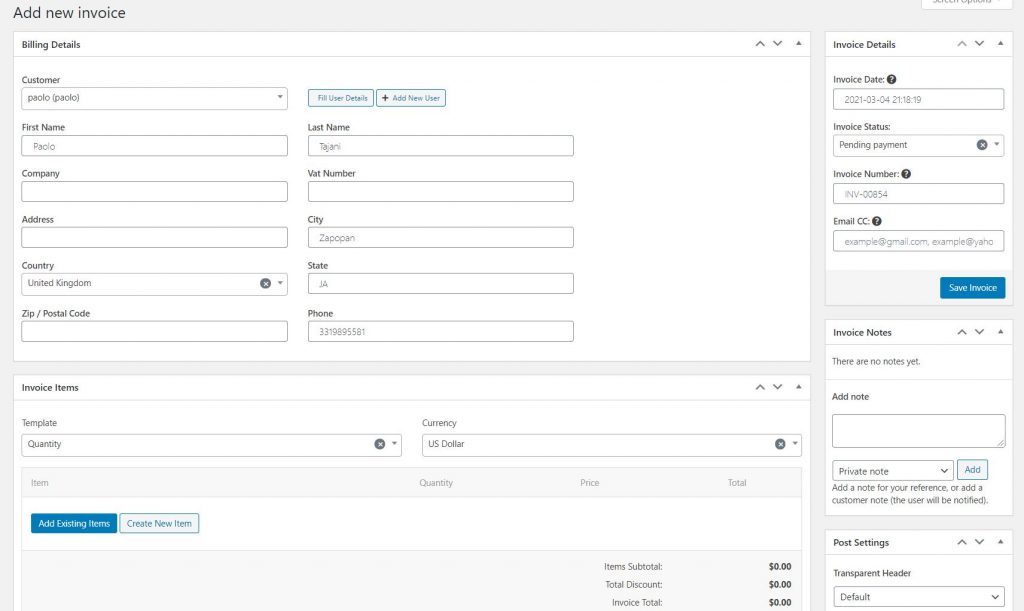
You will find the Add New Invoice Screen.

Here you will find five sections:
- Billing Details
- Items
- Description
- Details
- Notes
Billing Details

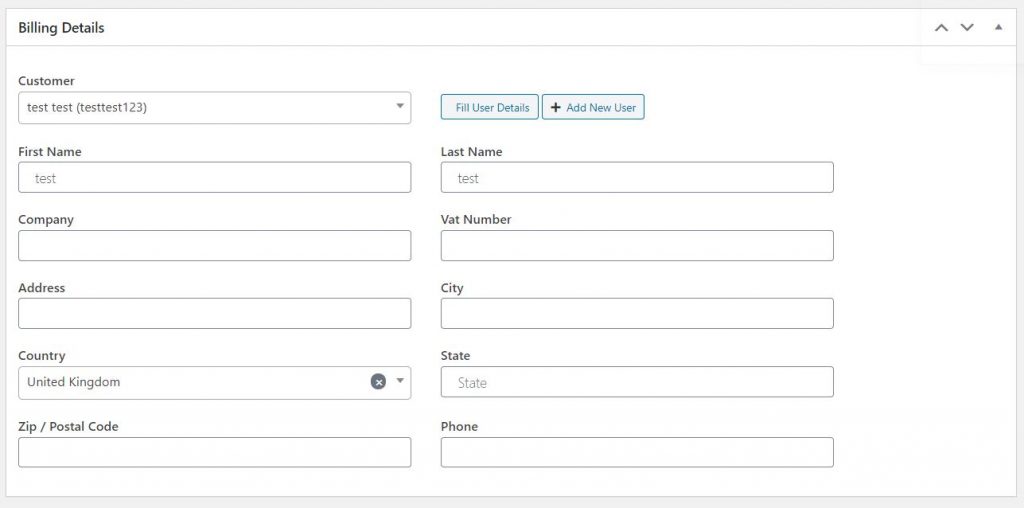
You add Customer Details by selecting an existing customer or adding a new customer.
Invoice Items

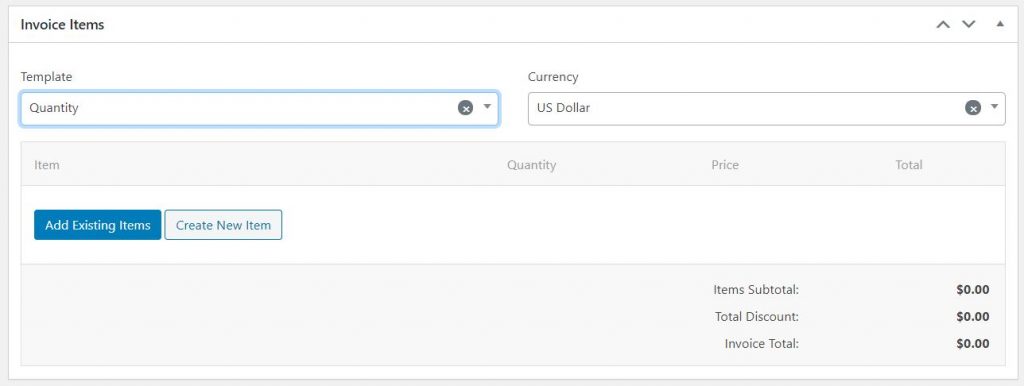
An Item is whatever you are selling:
A product, a service, a fee, or whatever you want to trade in exchange for a payment.
Here you can add an existing item or create a new item.
You can invoice using three templates:
- Quantity
- Hours
- Amount only
You will also be able to set the currency.
New items created here will be available for future invoices too.
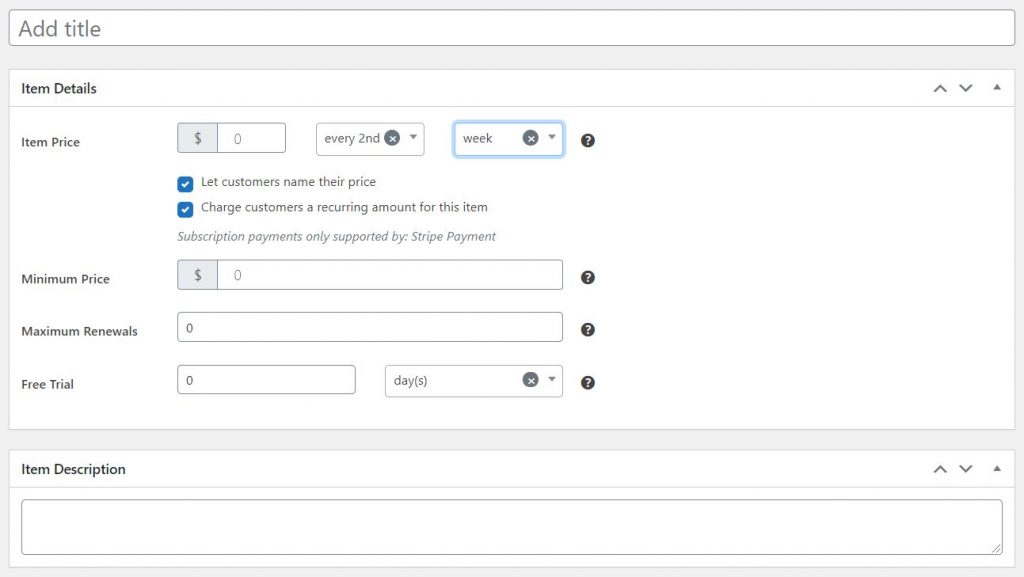
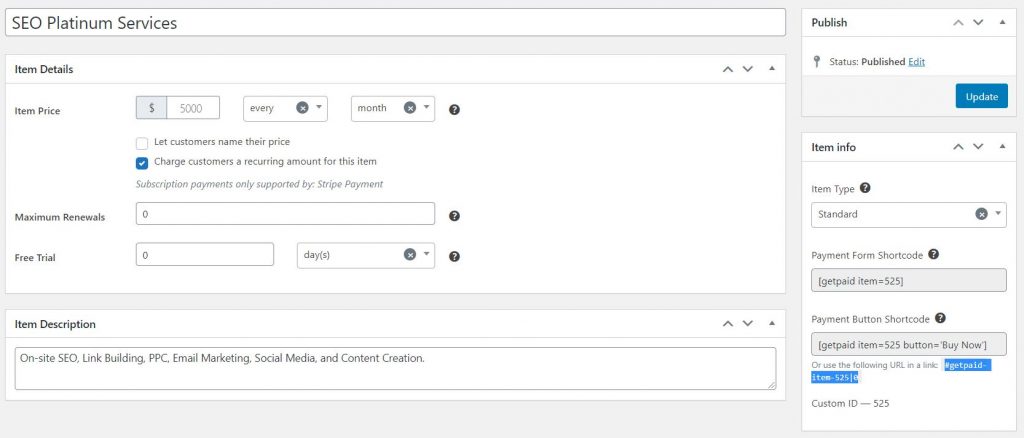
For new Items, you can:
- Set the Item Price
- Enable the option to let customers name their price (with a minimum amount if needed)
- Enable Recurring Payments for the online subscription business (daily, weekly, monthly, or yearly subscriptions and many more options)
- Enable Free Trial
- Add an Item Description

Invoice Description


This is the description text that appears on the invoice.
Invoice Details

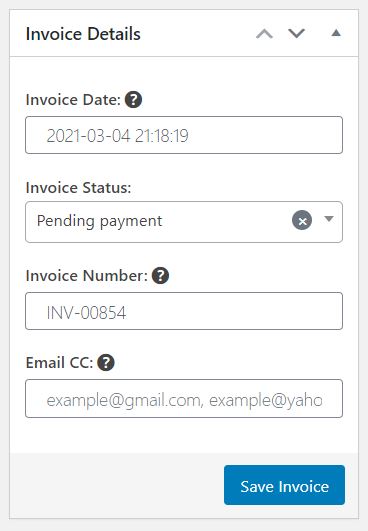
such as:
- Invoice Date
- Status
- Invoice Number
- Email CC
Invoice Notes

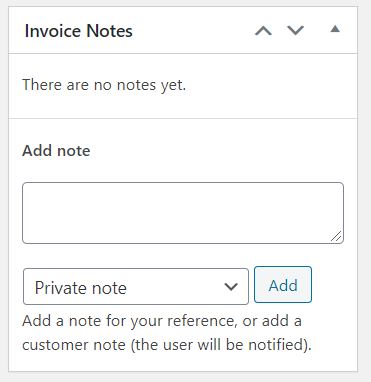
These can be private notes that you leave for yourself and your team or that are sent to the customer.
Save & Send
After completing the previously described section, save the invoice, which will send an email to the customer with a link to the invoice.
The invoice will look like this:

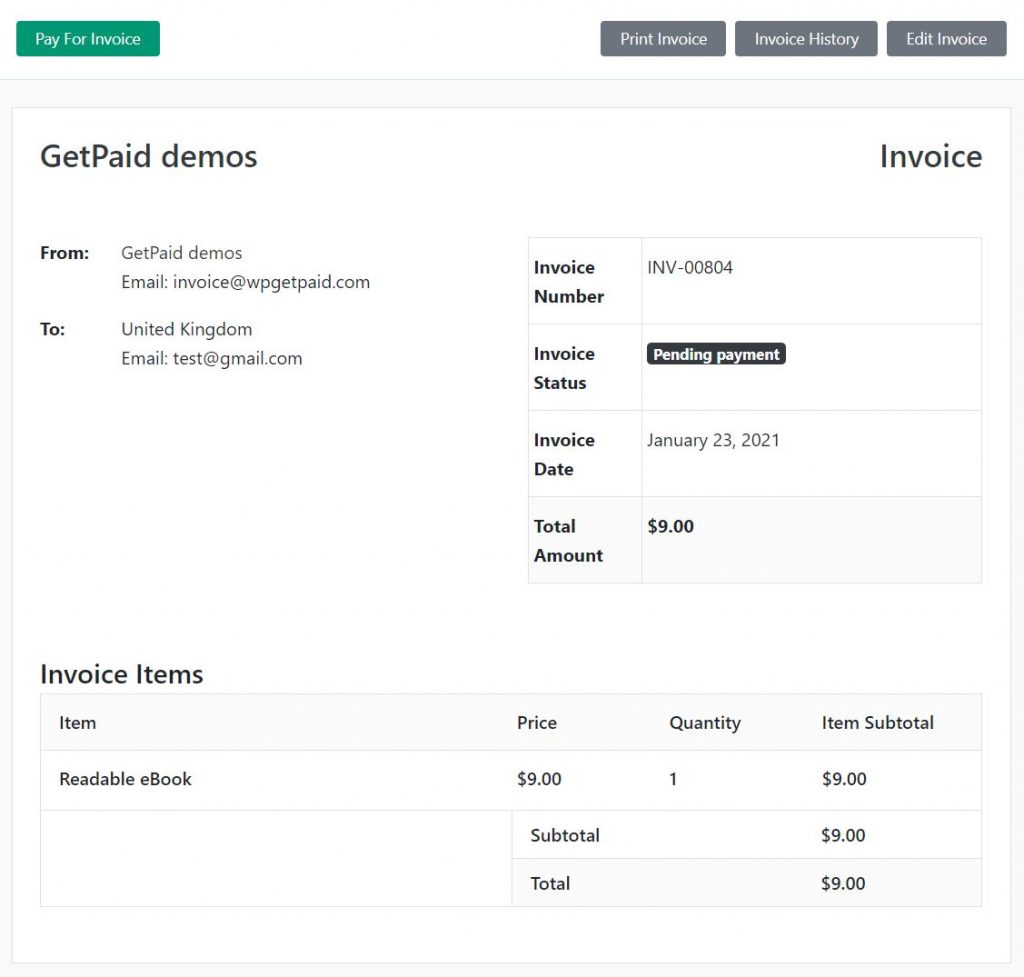
The customer can pay it online through the Payment gateway of choice by clicking the “Pay for invoice” button.
This is it; now, let’s see how you can sell items even when sleeping and generate passive revenues and income.
Buy Now Buttons
Some items are unique for one customer, like the fees associated with designing and developing custom websites.
According to the customer’s requests, the cost may vary.
But if you are selling maintenance fees or SEO services, the prices will probably be fixed according to the level of service provided, and most likely, these fees will be recurring.
You can sell similar items on any website page and earn passive revenues.

Of course, you can sell a lot more than just services. You can sell physical products, digital downloads, and tickets, accept donations or funding, and a lot more.
After you create your item, on the Item Info Section on the right sidebar, you’ll find the shortcode to publish the “Buy Now” button on any website page.
Indeed, you can also use a Gutenberg Block, a WordPress Widget, or just a custom URL into any link or button from any page builder like Elementor, Beaver Builder, Divi, or Oxygen.
This is ideal for Sales Funnel and Landing Pages. When clicked, the buy now button will expose the Checkout form inside a lightbox window modal.

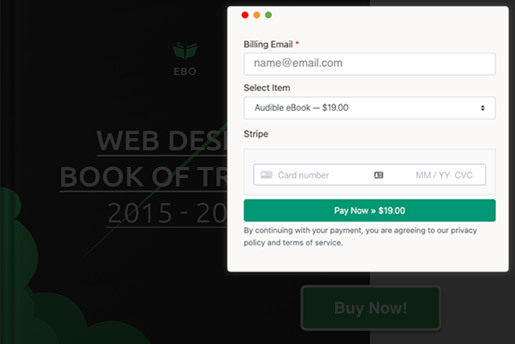
If you wish to see a few examples of this in action, you can check our demos:
Buy Now Button Demos
- productized service with subscriptions | for any kind of service
- physical product one-time fee | for any kind of physical product
- digital product PWYW with min amount | pay what you want options
Optimized Check-out Forms

One-page checkout forms are the best converting ones. If the checkout form is inline on the landing page showcasing a product, conversion increases even more, especially if the checkout form is as streamlined as possible.
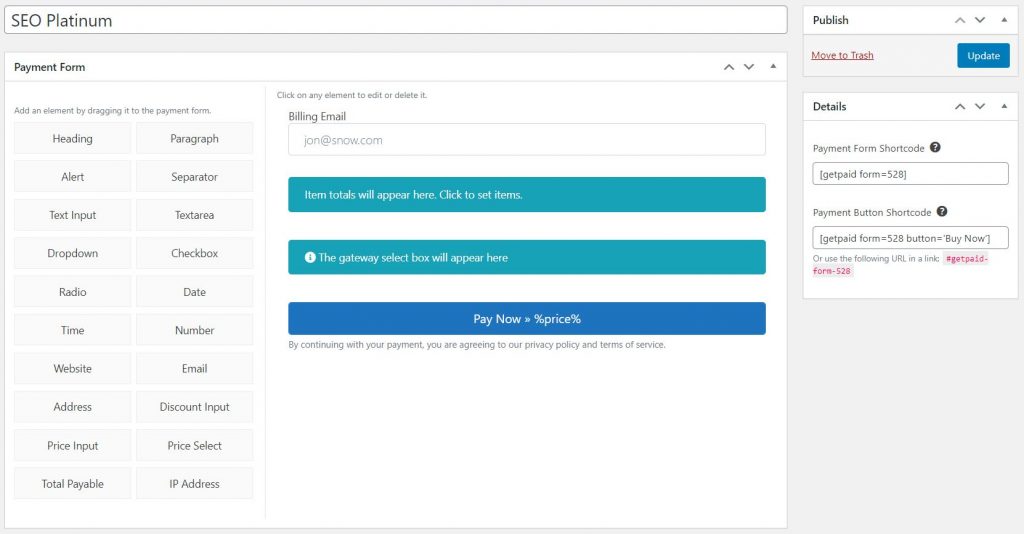
GetPaid allows you to create a custom check-out form for each Item, service, product, or fee you sell on your website.
You can add the checkout form anywhere on your website, just like our “Buy Now” buttons.
- This shortcode [getpaid item=525 button=’Buy Now’] will output the “Buy Now” button for the item with id 525.
- This shortcode [getpaid item=525] will output the default checkout form for the Item with id 525.
- This shortcode [getpaid form=527] will output the custom checkout form with id 527. You can attach one or more items when creating the custom form.

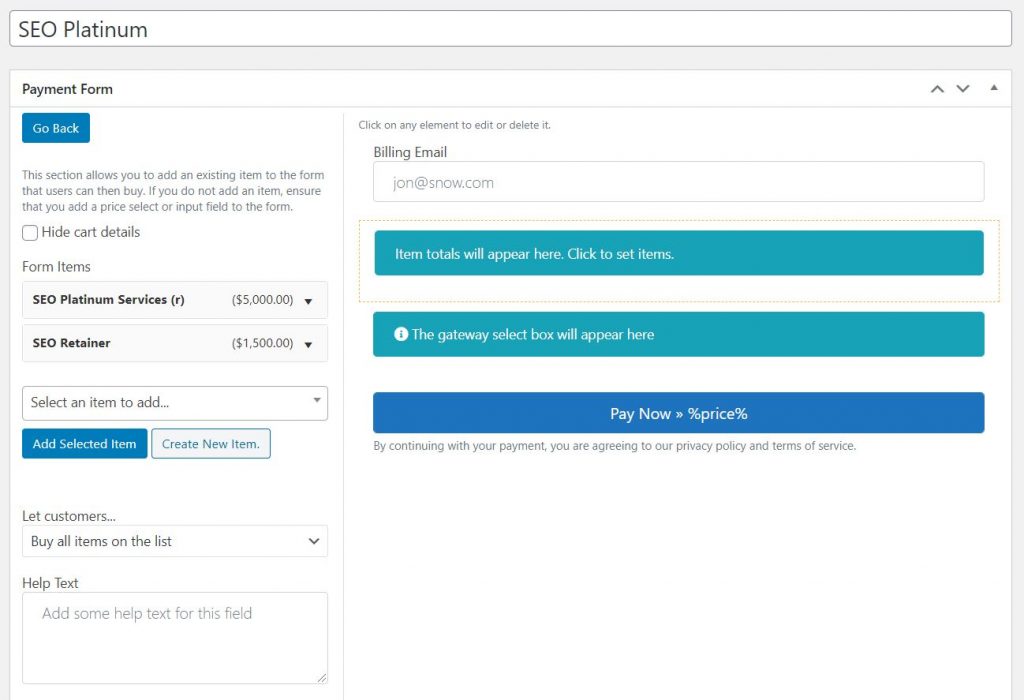
Add one or more items with a fixed price and one with a recurring fee on the same Optimized checkout form.
Create a checkout form with only the fields to request an email and credit card number (for Digital Services and only if paid via the Stripe payment gateway).
Or create a form requesting as much info as you want using the following fields:
- Heading
- Paragraph
- Alert
- Separator
- Text Input
- Textarea
- Dropdown
- Checkbox
- Radio
- Date
- Time
- Number
- Website
- Address
- Discount Input
- Price Input
- Price Select
- Total Payable
- IP Address
You can also add as many items as needed and let users:
- Buy all items on the list
- Select a single item from the list
- Or Select one or more items on the list
- Select a single item from a dropdown
If you wish to see a few examples of Optimized Inline Checkout Forms, you can browse our demos:
Optimized Checkout Form Demos
- service retainer and recurring payment | a 1-time fee + a recurring fee
- physical product subscription | for recurring payments
- digital product with variations | 2 SKUs to choose from
We also created some other examples. You can see them all here in the GetPaid official DEMO
Free Stripe Payment Gateway


To celebrate the release of the GetPaid plugin, we decided to release the Stripe Payment Gateway as a free plugin that can be found on the WordPress.org repository.
The Stripe Payment Gateway was our best-selling add-on for the Invoicing plugin, so we hope you’ll appreciate it.
New Premium Add-ons and Payment Gateways
We updated all Add-ons and Payment Gateways of the Invoicing plugin to work with GetPaid, and we’ll keep adding new Payment gateways like the Square Payment Gateway for GetPaid that we just released.
We also already added a new extension: Digital Downloads for GetPaid. Paired with the inventory add-on (to be released soon), you could use it to create a WordPress Event Tickets Marketplace.
Shortly, we will also release an Upsell, Downsell, and Product Bump add-on, a Wallet add-on (Marketplace?), and plenty of other extensions. Most of them are fully integrated with GeoDirectory.
We hope you’ll enjoy the GetPaid plugin, and if you have any feedback, please don’t hesitate to share it with us.