This article explains how to setup the Authorize.net payment gateway with GetPaid.
Overview
Authorize.net is a popular online payment solution. It supports numerous currencies, credit/debit card payments, and can be integrated with GetPaid with the help of our Authorize.net Payment Gateway extension within minutes.
Settings Overview
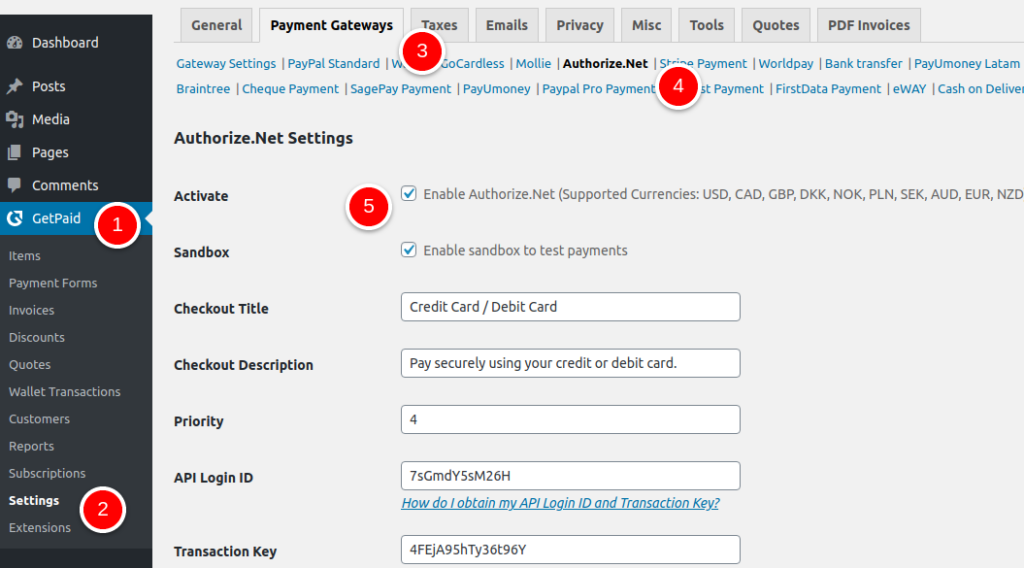
- Activate – In order to use Authorize.net as your payment gateway, you need to check this box to activate it.
- Sandbox – If you wish to enable sandbox for testing purposes, check this box.
- Checkout Title – The title of the checkout field.
- Checkout Description – This is where you can add a description for the checkout field.
- Priority – Specify the priority for this payment gateway.
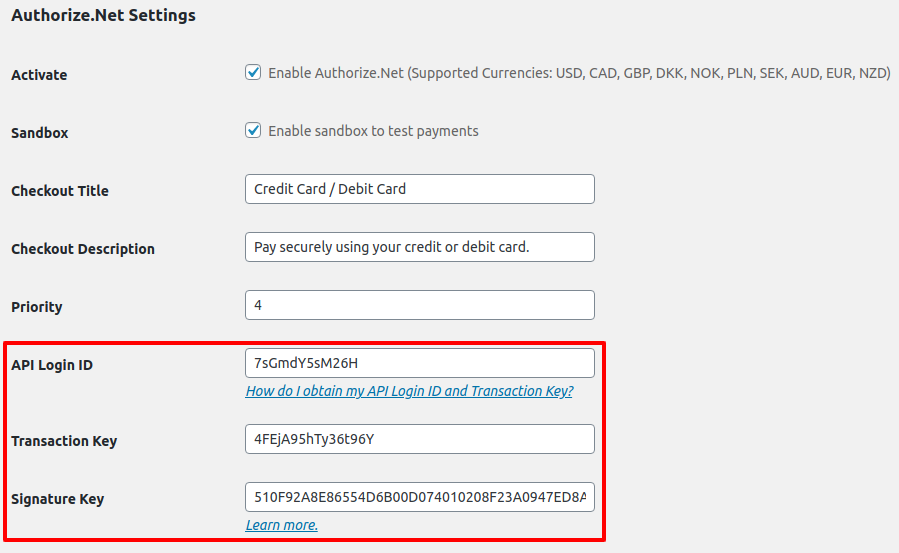
- API Login ID – Input your Authorize.net API login ID in this field.
- Transaction Key – Enter your Authorize.net Transaction Key in this field.
- Signature Key – Enter the Authorize.net Signature Key in this field.
- Webhook URL – This URL needs to be copied and pasted into your Authorize.net control panel. You can find details here.
Usage
In order to get started with Authorize.net payment gateway, it is a good idea to first sign up for an account.
- 1
- Once you have signed up for an Authorize.net account, head to GetPaid > Settings > Payment Gateways > Authorize.net and tick the Activate option.
- 2
- Input you API Login ID, Transaction Key and Signature Key in the relevant fields. (You can find instructions for getting an API Login ID on this page; and you can learn about Authorize.net Signature Keys here).
- 3
- Save your settings.


Lastly, remember to copy your Webhook URL and paste it into your Authorize.net control panel.