This is the Setup Guide for the Item Downloads extension for GetPaid.
Overview
Item Downloads, as the name suggests, allows you to add downloadable items to your GetPaid site. Such items, or products, can be downloaded by your customers, depending on the settings that you specify.
1. Pick a Downloads Page
Once you have installed and activated the Item Downloads extension, you can head straight to setting things up.
- 1
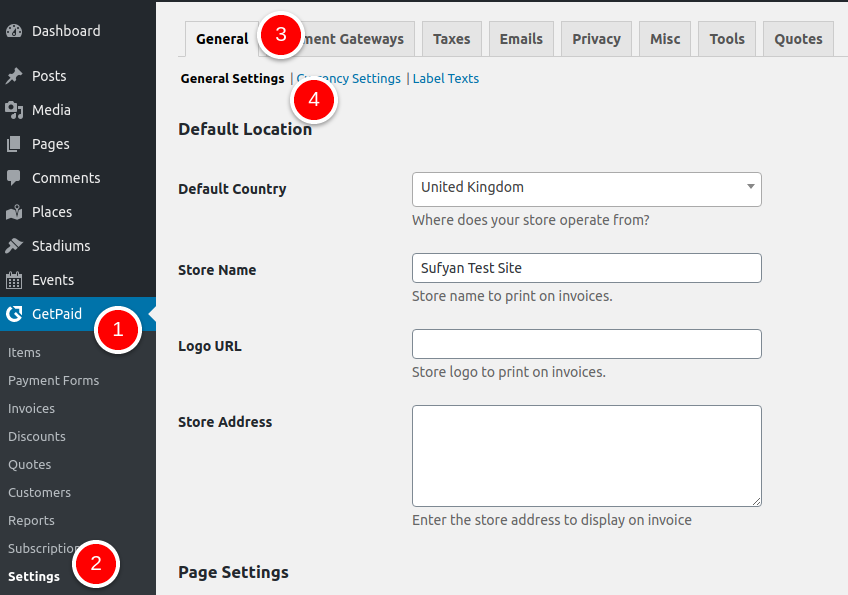
- First, you need to specify a Downloads page. To do so, head to GetPaid > Settings > General (tab) > General Settings (sub-tab).
- 2
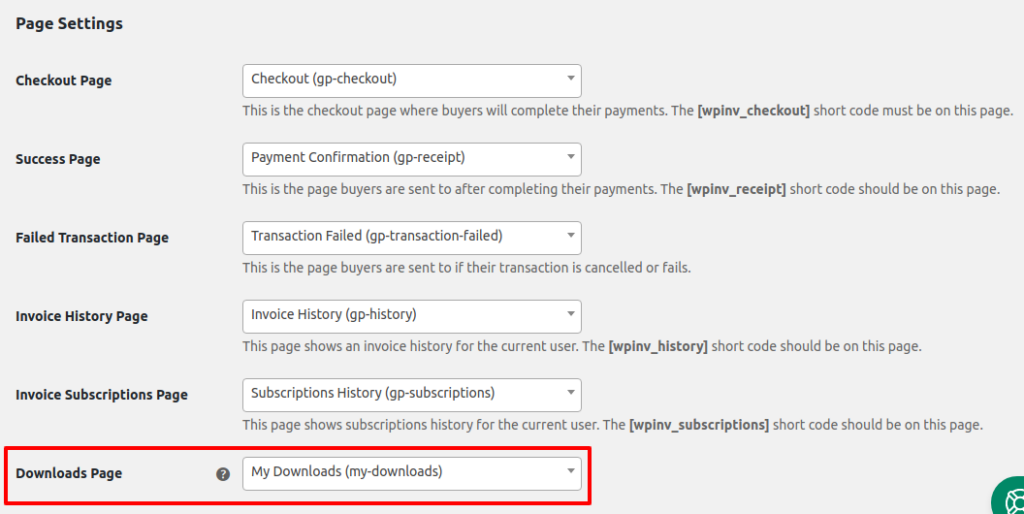
- Scroll down to the Page Settings section. Therein, you need to pick a Downloads Page.
2. Choose a File Download Method
Item Downloads provides three file download methods to choose from:
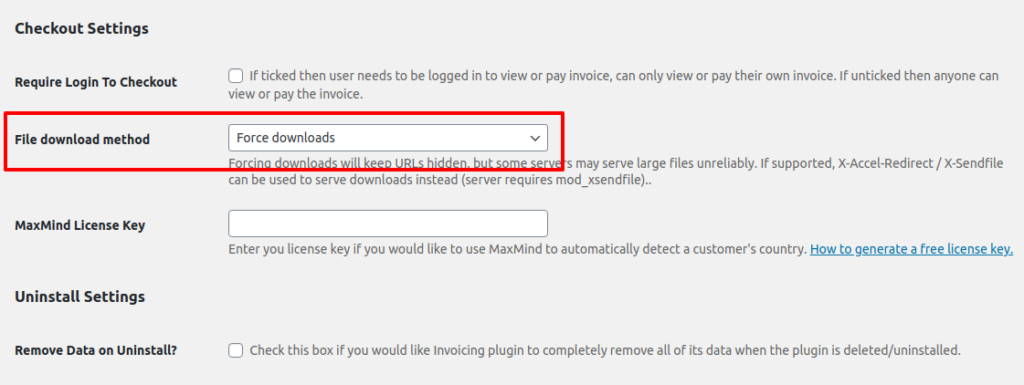
- Force Downloads – Forcing downloads will keep URLs hidden, but some servers may serve large files unreliably.
- X-Accel-Redirect or X-Sendfile – This option can be used to serve downloads easily, but may not be supported on all servers. Before enabling, be sure to check with your web hosting provider if their server supports mod_xsendfile.
- Redirect Only – This is an insecure option that we do not recommend.
- 1
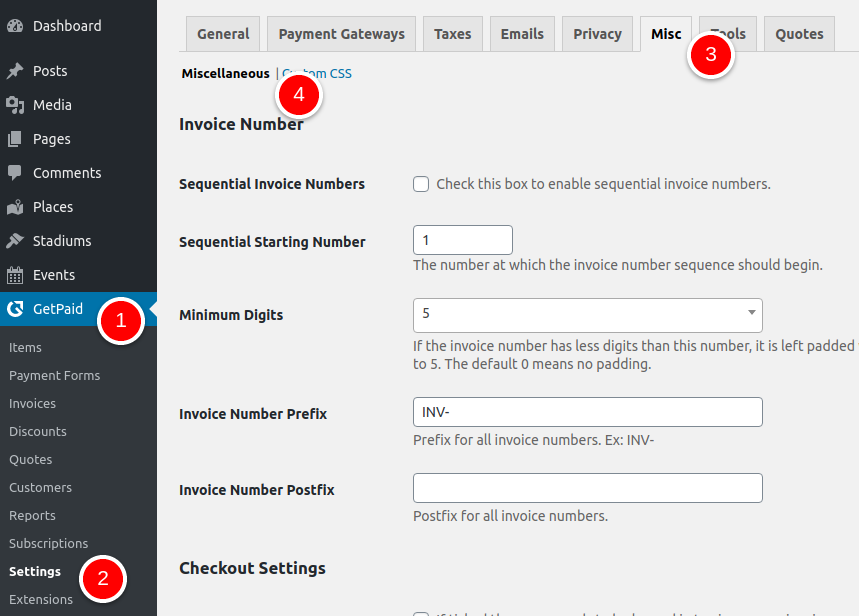
- To pick the File Download method of your choice, head to GetPaid > Settings > Misc (tab) > Miscellaneous (sub-tab).
- 2
- Scroll down to Checkout Settings and then pick the right File Download Method as per your needs. Be sure to Save your settings.
3. Working with Downloadable Items
Item Downloads integrates seamlessly with GetPaid. Essentially, when you activate the Item Downloads extension, it adds a few extra meta fields to Items CPT that can help you specify downloadable properties.
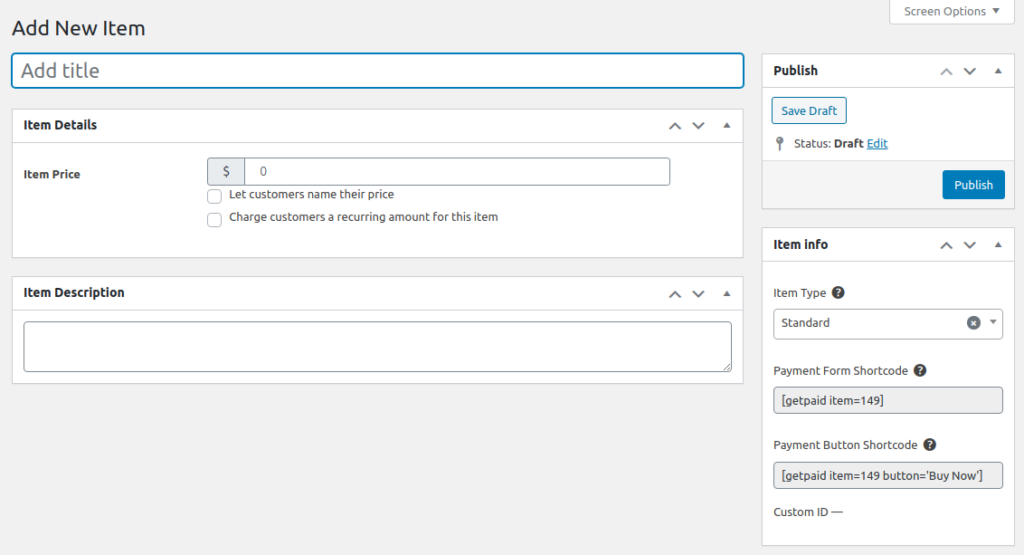
For instance, here is the Add New Item page without Item Downloads extension:
And here is what the same page looks like after Item Downloads has been installed and enabled (activated):
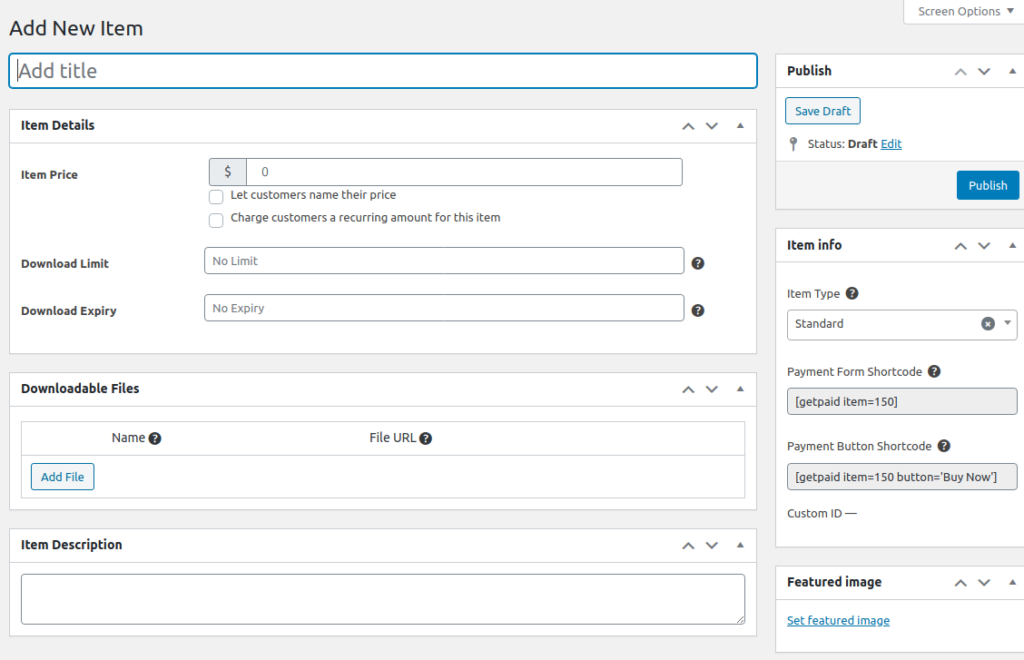
To give you a clearer idea, here is a run-down of what each new option does:
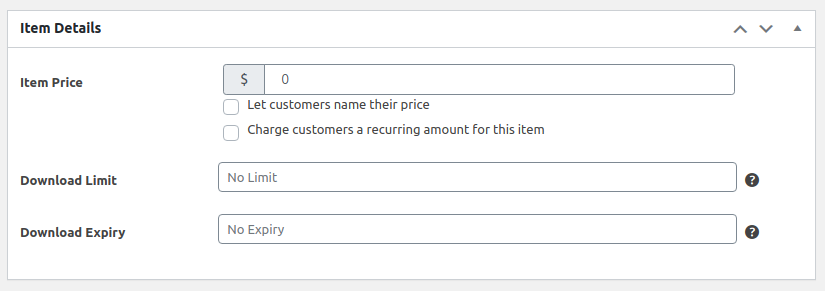
- Download Limit – This value is used to limit the number of times a given set of files can be downloaded. If you leave it blank, users get to download the files an unlimited number of times.
- Download Expiry – This value (specified in natural numbers) is used to provide a specific number of days before a download link expires. If you leave it blank, the link will never expire. It is useful for time-sensitive files.
- Downloadable Files – This is where you can add the files that are available as downloads for a given item. There is no limit to the number of files that can be added as Downloadable Files to a particular item.
4. Adding Downloadable Files
- 1
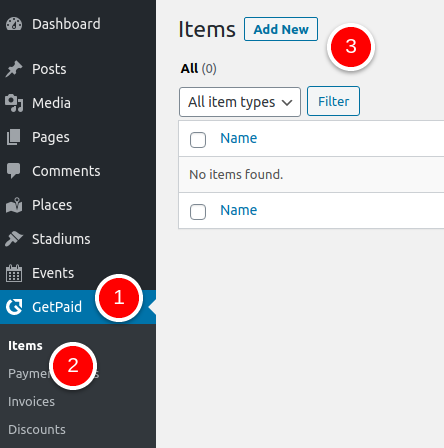
- To add downloadable item files, go to GetPaid > Items > Add New Item.
- 2
- Now, simply specify your Download Limit and Download Expiry value, or leave them blank for limitless and timeless downloads.
- 3
- To add Downloadable Files, click Add File. Input a File Name, then specify the File URL. Alternatively, you may also Browse the Library or Upload Files.

You can add multiple files to one item and then publish it just like any other Item CPT.