Before you can add new ads, you need to add at least one zone to your site.
Adding New Zones
- 1
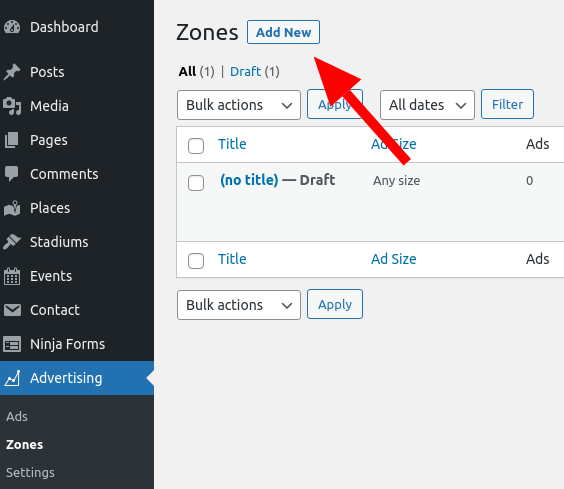
- Head to Advertising > Zones and then click Add New.
- 2
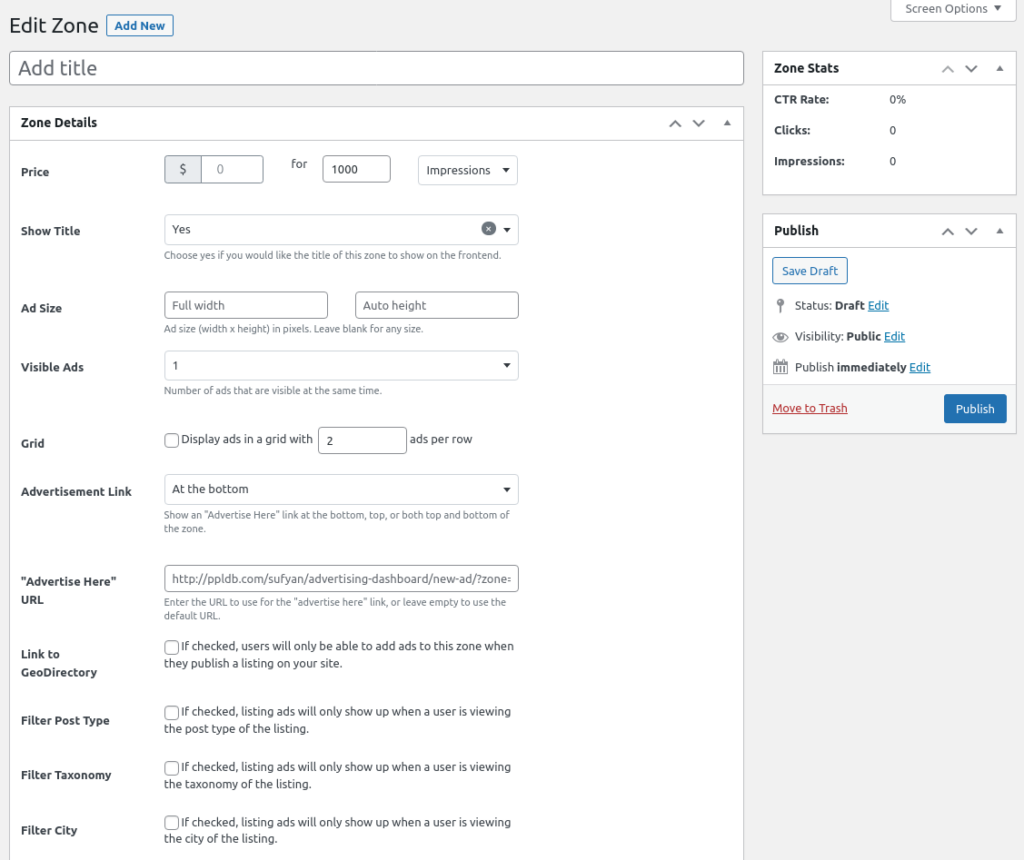
- On the Add New Zone page, specify the Title and other relevant Zone Details, and then click Publish.


For additional information, here is a rundown of each option from the Add New Zone page:
Zone Details
- Price – Specify the price per impression or number of days or number of clicks.
- Show Title – Choose whether or not to display the zone title.
- Ad Size – Specify the size of advertisements under this zone; leave blank for all sizes.
- Visible Ads – Choose the number of ads that are visible at a given time.
- Grid – Choose whether to display the ads in a grid.
- Advertisement Links – You can choose to show an “Advertise Here” link, either under the ads, or above them. You may also disable this option.
- Advertise Here URL – Specify the URL for the “Advertise Here” link.
- Link to GeoDirectory – If checked, users will only be able to add ads to this zone when they publish a listing on your site.
- Filter Post Type – If checked, listing ads will only show up when a user is viewing the post type of the listing.
- Filter Taxonomy – If checked, listing ads will only show up when a user is viewing the taxonomy of the listing.
- Filter City – If checked, listing ads will only show up when a user is viewing the city of the listing.
- Zone Description – You can enter some text about the zone; this is displayed to Advertisers when they are adding a new ad for the said zone.
Usage Details
- Ad Injection – Choose where to insert or display the zone on the frontend.
- Shortcode – Use this shortcode to display the zone in a post or page.
- Template Code – Use this code to insert the zone into your theme templates.
Looking for a WP business directory SAAS? Check out this blog post.