Webhooks are automatic notifications sent from Stripe to your website whenever transaction events happens in your Stripe account. Stripe communicates with your website for events like successful payments, refunds, creating subscriptions, subscription renewals etc.
Adding a Webhook in Live mode
1. Navigate to Webhooks
Login to your Stripe Dashboard > Webhooks
2. Add a New Endpoint
On the Webhooks page, click the “Add destination” button.

3. Select Webhook Events
Stripe webhook events are automated, asynchronous notifications sent from Stripe to your website endpoint URL when a real-world event occurs in your Stripe account.
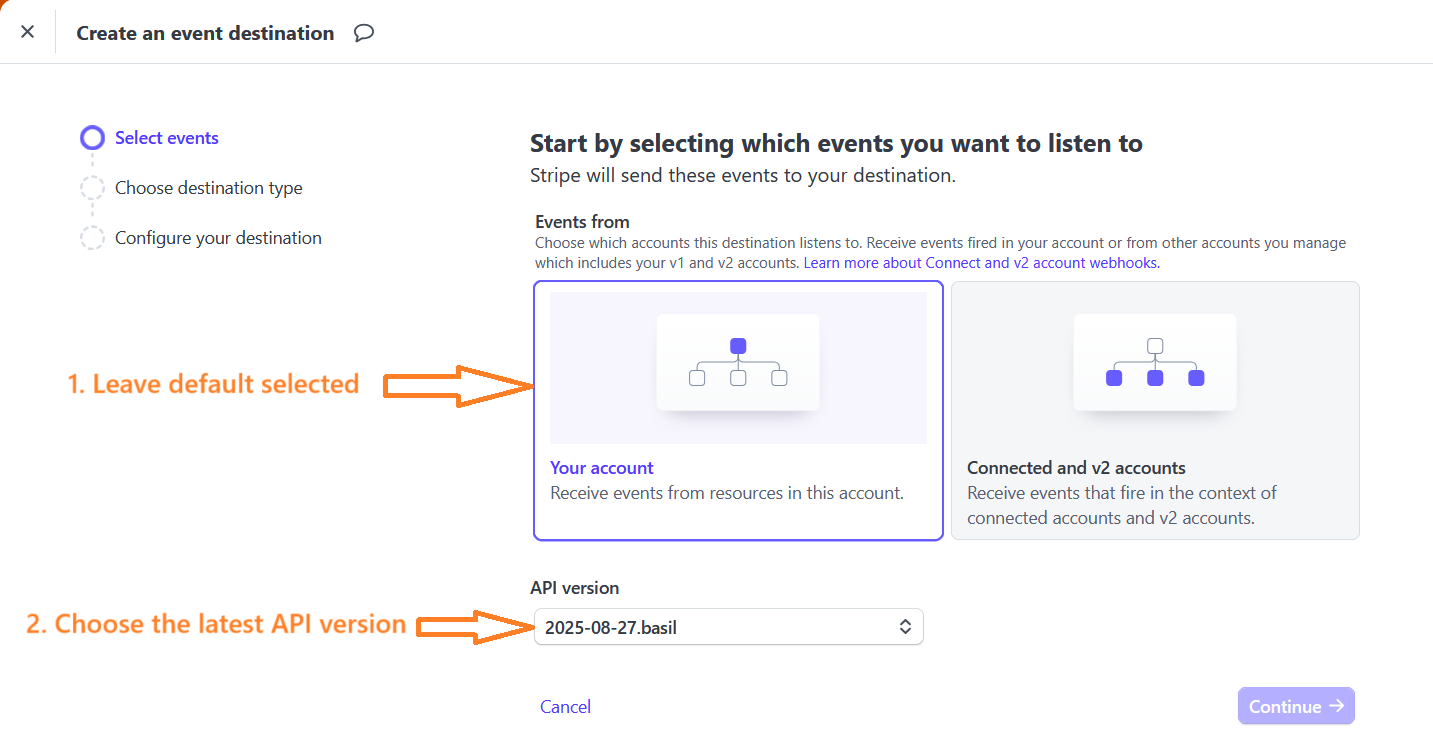
Under Select events, leave a default choice “Your account” as selected to receive events from & choose the latest API version from the list.

Under Select events, you now will need to add the specific events required by GetPaid Stripe Payments add-on. Under All events, search for the event & tick checkbox to choose the event.
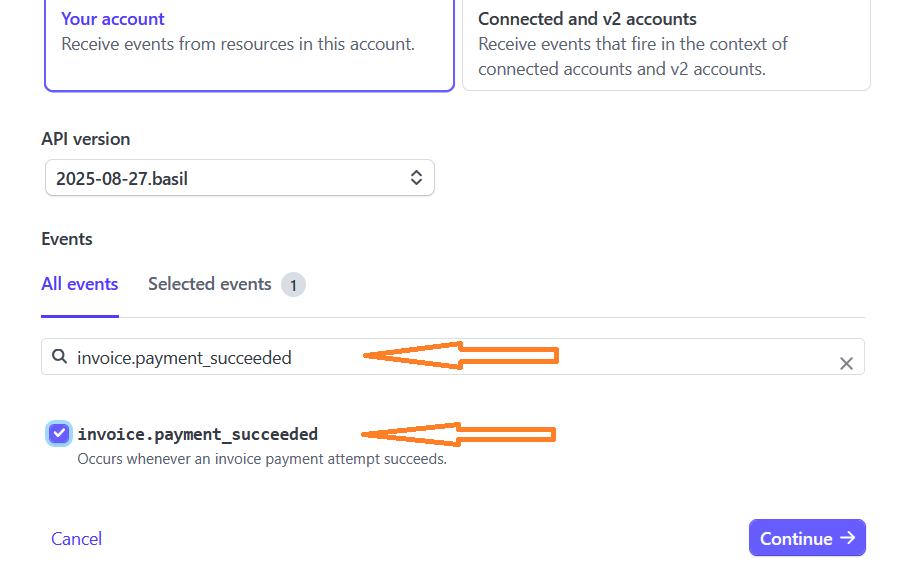
You need to select following 14 events:
- charge.refunded
- checkout.session.completed
- customer.subscription.created
- customer.subscription.trial_will_end
- customer.subscription.deleted
- customer.subscription.updated
- invoice.payment_failed
- invoice.payment_succeeded
- payment_intent.succeeded
- setup_intent.canceled
- setup_intent.created
- setup_intent.requires_action
- setup_intent.setup_failed
- setup_intent.succeeded
Click on Continue button after all required events are selected.
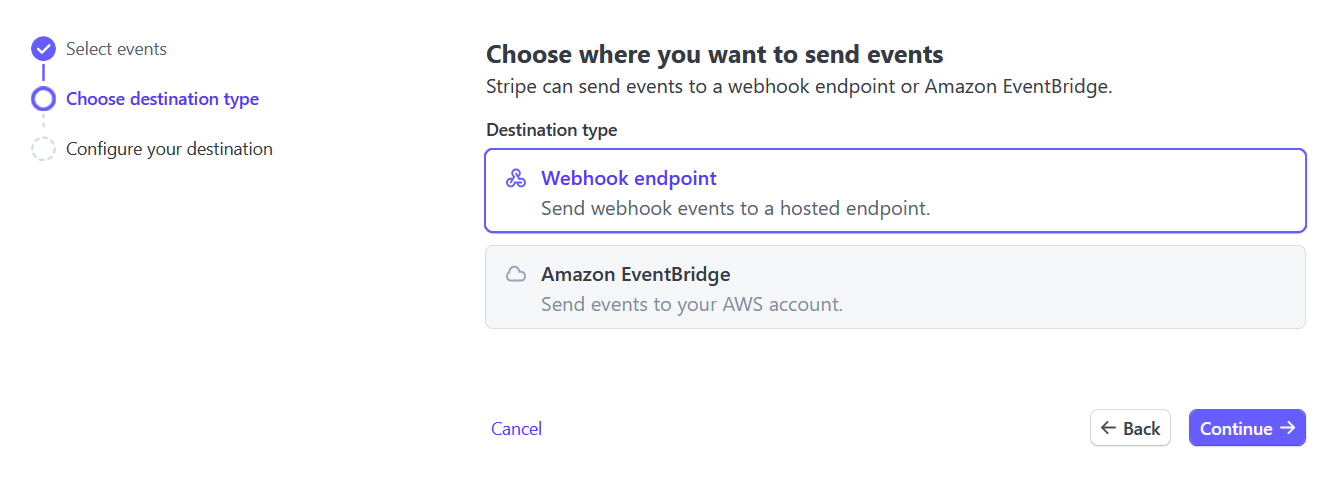
4. Choose Destination Type
Choose Webhook endpoint as destination type and click Continue.

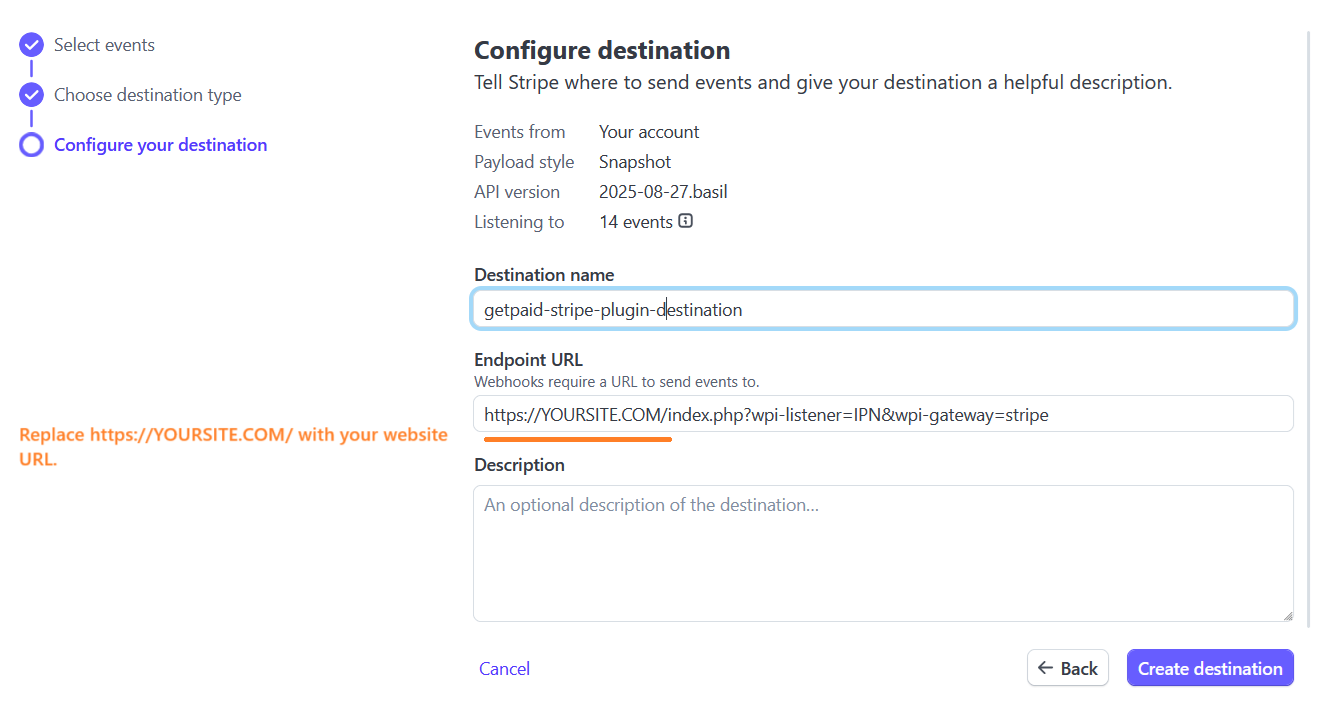
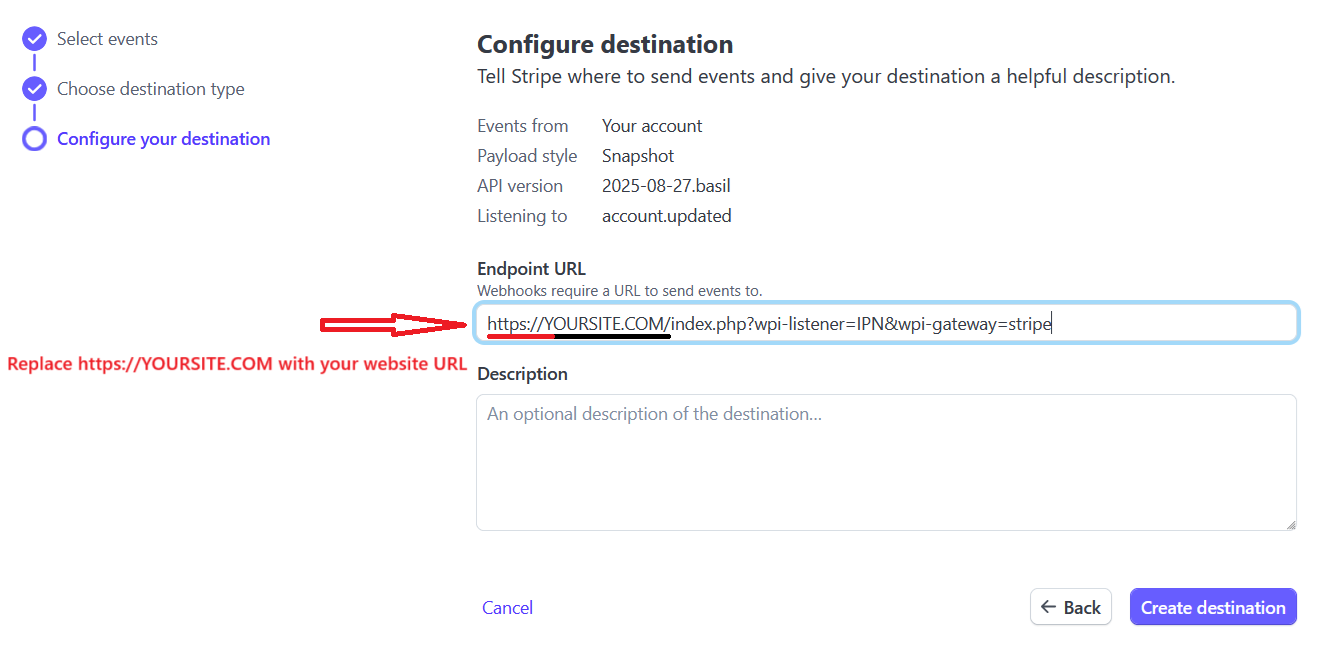
5. Configure Endpoint URL
Copy URL from your website WordPress Dashboard > GetPaid > Settings > Payment Gateways > Stripe Payment > Stripe Webhook URL and paste it at Stripe Endpoint URL and click Create Destination.
You can manage webhook under Stripe Dashboard > Webhooks
Adding a Webhook in Test mode
1. Navigate to Webhooks
Login to your Stripe Dashboard > Webhooks
2. Add a New Endpoint
On the Webhooks page, click the “Add destination” button.

3. Select Webhook Events
Stripe webhook events are automated, asynchronous notifications sent from Stripe to your website endpoint URL when a real-world event occurs in your Stripe account.
Under Select events, leave a default choice “Your account” as selected to receive events from & choose the latest API version from the list.
Under Select events, you now will need to add the specific events required by GetPaid Stripe Payments add-on. Under All events, search for the event & tick checkbox to choose the event.

You need to select following 14 events:
- charge.refunded
- checkout.session.completed
- customer.subscription.created
- customer.subscription.trial_will_end
- customer.subscription.deleted
- customer.subscription.updated
- invoice.payment_failed
- invoice.payment_succeeded
- payment_intent.succeeded
- setup_intent.canceled
- setup_intent.created
- setup_intent.requires_action
- setup_intent.setup_failed
- setup_intent.succeeded
Click on Continue button after all required events are selected.
4. Choose Destination Type
Choose Webhook endpoint as destination type and click Continue.
5. Configure Endpoint URL
Copy URL from your website WordPress Dashboard > GetPaid > Settings > Payment Gateways > Stripe Payment > Stripe Webhook URL and paste it at Stripe Endpoint URL and click Create Destination.
You can manage webhook under Stripe Dashboard > Webhooks